|
|
Side Panel Jig |
|||||||||
Whilst most of the panels that make up the Kit are watercut, the side panels are routed using a pattern. Any holes required in the sides can be done at the same time
by drilling through matching holes in the pattern. However any required holes in the edges of the parts require a Jig to be manufactured to ensure that they are always in the correct place. The top and botton edges
of the Weta Punga side panels require two identical rows of 5 pilot holes for the #6 Plastite screws that attach the top and bottom panels to the sides. |
|||||||||
 |
|||||||||
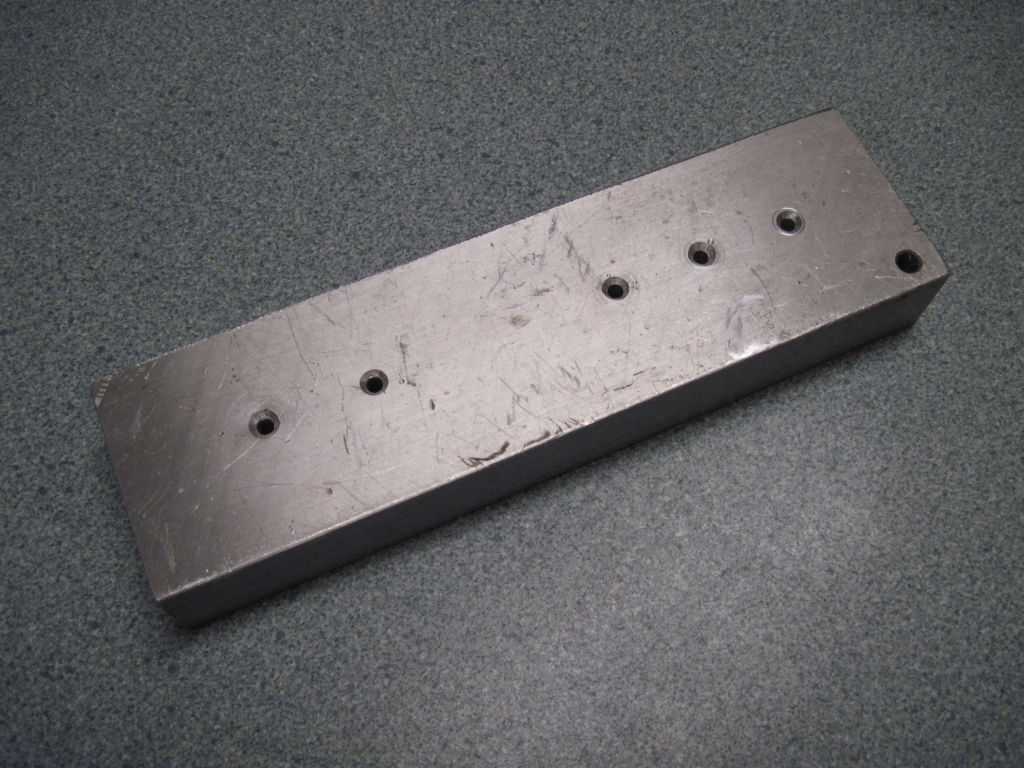
I started by drilling a series of holes with the correct spacing all the way through a 1" thick Bar of 2024 Aluminium (if high volumes were required one would make the jig
from tool steel and then have it hardened). I locked the Y axis of the mill and then machined a 1/2" inch wide slot, 3/4" deep along the row of holes and added a Tee at the end in the righ place to act as a stop to
position the panels in the correct place each time. The solt was widened about 0.010" each side until the UHMW sides were a snug fit |
|||||||||
 |
|||||||||
The Bar was then turned over and the five holes were coumtersunk to help guide the drill bit. |
|||||||||
 |
|||||||||
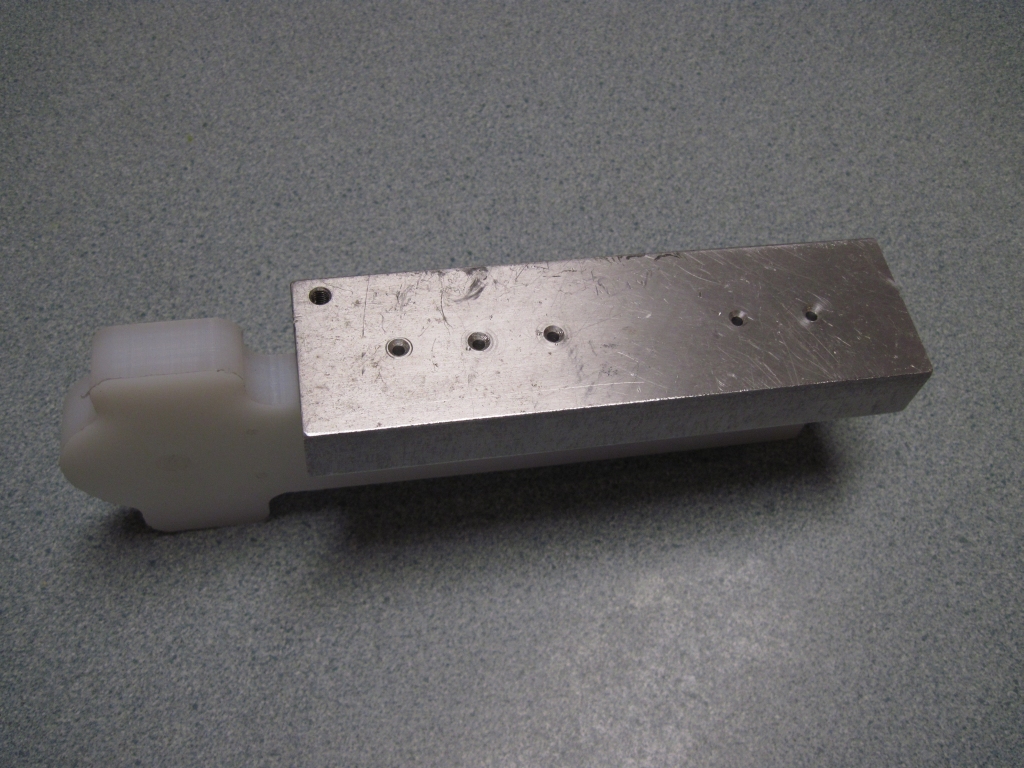
You can see here how the side panel fits neatly into the slot and how the Tee allows it to sit flush with the end of the slot. |
|||||||||
 |
|||||||||
The Jig on the part showing the holes through which to drill. I drilled mine out on a Drill press with the part held in a vise and the the jig placed on top and held tight against the end of the part when drilling. |
|||||||||
 |
|||||||||
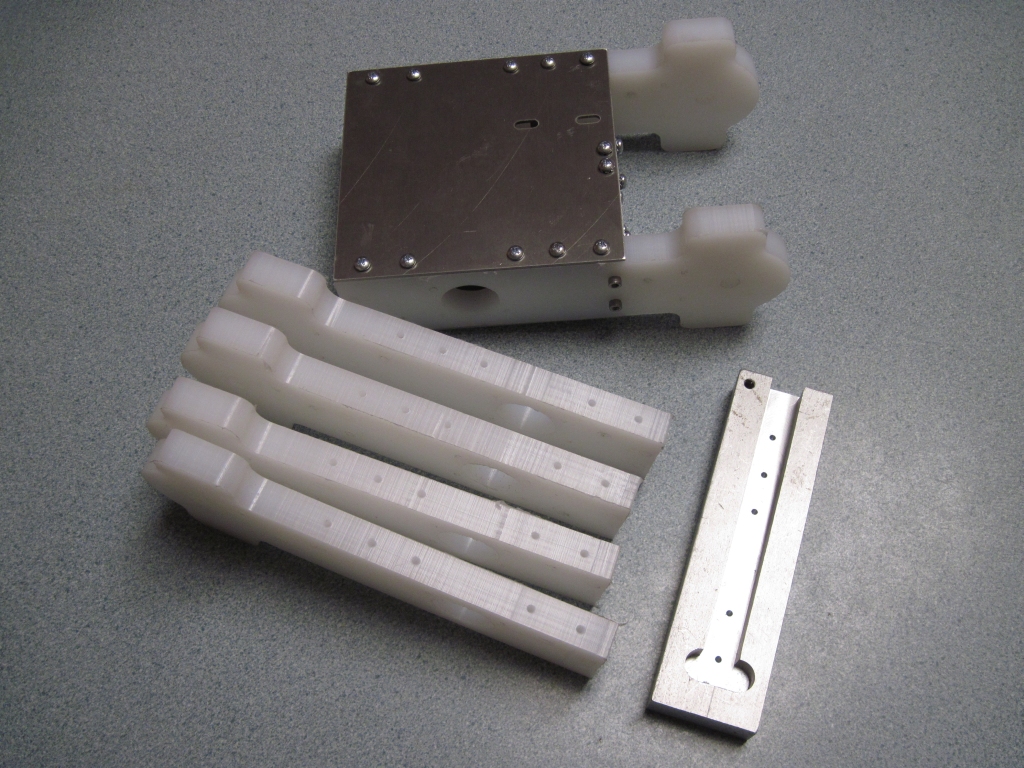
The Jig allows one to quickly and accurately add the required holes to as many parts as you like. The assembled Weta Punga Chassis is remarkably rigid once assembled. |
|||||||||