|
|
CheepShot 4.0 |
|||||||||||||||||
Our last 4WD wedge/brick design, Cheepshot 3.0 had proved to be an easy to build and maintain design. It had some success in various competitions and reached a
high point when it won the 2006 National Championship and also was the basis of a kit that was ideal for school summer camps etc. It was the rise in effectiveness of the
Spinners that finally meant that we had to come up with a new tougher design. We decided to go with an evolutionary rather than revolutionary approach. The old design had many good features that we would want to retain.
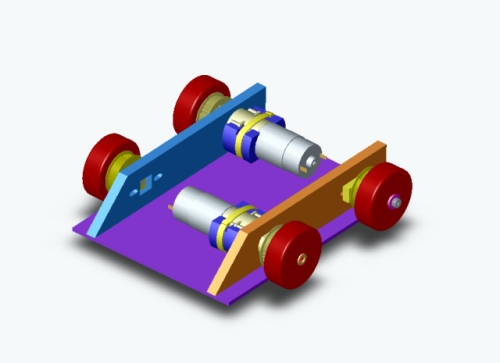
The drive system had proved very tough and had also been used on a similar 30lb bot without problems so that was retained but would now have a option to fit bigger Speed 700 motors for more power and
speed. The slot, tab and nutstrip chassis design had proved its worth again and again. It made original construction quick and simple, repairs easy and had proved amazingly strong, holding the bot together
even after terrible damage. The original design had been all been watercut from 3/16" and 1/4" polycarbonate (Lexan) and this had resisted impacts well for a couple of years. The rising power of the spinners had begun
to cause major cracks and splits to develop even in new parts. To prevent this problem a lot of the new parts will be made of UHMW. This plastic is not nearly so strong or stiff as polycarbonate but has enormous
resistance to cracking. Another problem with the original design was its short wheelbase which made straight line driving tough and restricted interior space. An increase of almost an inch should improve
both. The last version of CheepShot 3.0 had sloping sides as well as front. I would have liked to retain this feature but it greatly complicates how the front corners joined together. This was Ok for a one
off but for a design I wanted to make available as a kit it would add a lot to the cost. The front corners are also where most damage occurs and replacing custom machined parts on a regular basis could get
expensive and impossible at short notice.
|
|||||||||||||||||
 |
|||||||||||||||||
I worked from the old CAD files that had been used to design CheepShot 3.0. The wheelbase is stretched 22.5mm (an extra 9 teeth in the belts) and the interior walls have doubled in thickness to 1/2". The base will probably remain polycarbonate as it has rarely been damaged and it will give useful stiffness to the chassis. The drivetrain is retained as-is apart from the longer belts. |
|||||||||||||||||
 |
|||||||||||||||||
New "widestrip" in place |
|||||||||||||||||
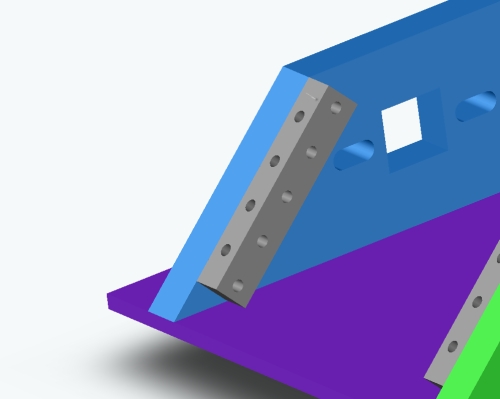
The mechanical properties of UHMW are quite different from the polycarbonate used before. It is softer and not as strong. The nutstrip used on CS3 was 3/8" x 3/8". This
meant the holes had to be quite close to the edge of the panel. This was not a problem on the tough polycarbonate but is on the UHMW. To get around this I will use a varient of the nutstrip idea which I am calling
"widestrip". This will be based on a 3/8" x 1/2" bar and will allow the mounting holes on the internal panels to be a little further from the edge. That combined with the 1/2" thick panels should be a big
improvement over the original design. This "widestrip will be added to the kitbots web store. |
|||||||||||||||||
 |
|||||||||||||||||
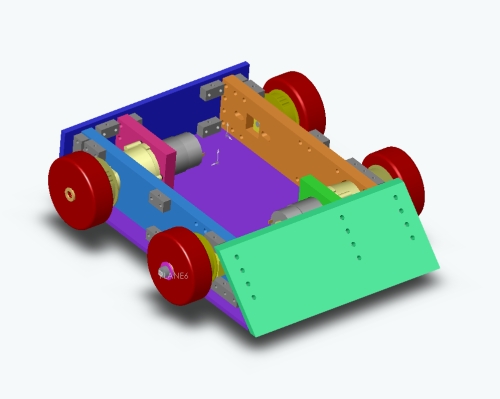
All the basic panels have been created and various lengths of the new widestrip used to join them together. The front and rear panels are used just to keep the Bot
together until the Armour is added. A spreadsheet was created to calculate the designs weight. The appropriate material density figures are entered in the solidworks ,models and accurate weights of each panel are
given using the "Mass Properties" tool. It is a good idea to add as much detail to the spreadsheet as possible so that you make sure the design is not going over the class weight limits. First Pass CS4 Weight Spreadsheet The next step is to add the slots and tabs to each panel. These add greatly to the strength of the design and also make it easier to assemble. |
|||||||||||||||||